
Once you've selected the right sources and trained your AI, it's time to configure it's user experience. If the Unless script is installed on your website, you will have access to additional settings via the AI component editor.
Configuring your AI
The Configuration tab, located under the User experience section, is where you can adjust the settings of your AI. You can add the name of your product, select a persona with a specific focus such as support, sales, or informative and set the preferred response length.
When it comes to response length, we generally recommend opting for long (or max) answers. Especially, if you are in an industry that can be more complicated and nuanced, longer responses might be the way to go. However it is best to test the AI with some questions to see what yields the best results for your particular case.

Here you also choose whether to allow all languages or select a few that you support in which case the AI will only respond in your chosen languages. Make sure to also select a fallback language to be used for cases when the language cannot be confidently determined.
Additionally, you can set positive or negative feedback replies for the AI to use when it receives feedback in the form of a thumbs up or down. Make sure you click Save after any changes you make.
Then, if the Unless script is installed on your website (or help center, dashboard, etc.) it's time to open up the AI component editor.
AI component editor
Once in the editor, you will see a number of tabs on the right such as display, layout, contact tab, and more. We recommend clicking around to see the different settings that you can adjust. Below we highlight the most commonly used fields.
Layout options
The first field under the layout tab is the starting message, the first message that the user will see when they start interacting with your AI. Here you can also define what the starting message language should be based on.
You can choose to automatically detect the language of the starting message based on the page language and browser language. Alternatively, you can select if you want to use page language, browser language or use the original language of the starting message.

This is also the place to add the logos you want to be displayed with the AI. You also have the option to add starting AI actions, adjust the colors and set a default conversation name (visible to the user). The default disclaimer message to notify the end-user that they're talking to an AI is also editable.
Tip: Under the Other tab, you can switch on Expert mode which will present you with even more options under the Layout tab.
Contact details
You have the option to have an additional tab in your AI components for contact information. This way there's always a clear escalation path that people can use when interacting with the AI.
You can have up to three contact cards and you get to define what should be in the cards. You can enable a card and then give it a title and description, select an icon to show with it, and attach your desired action to it.
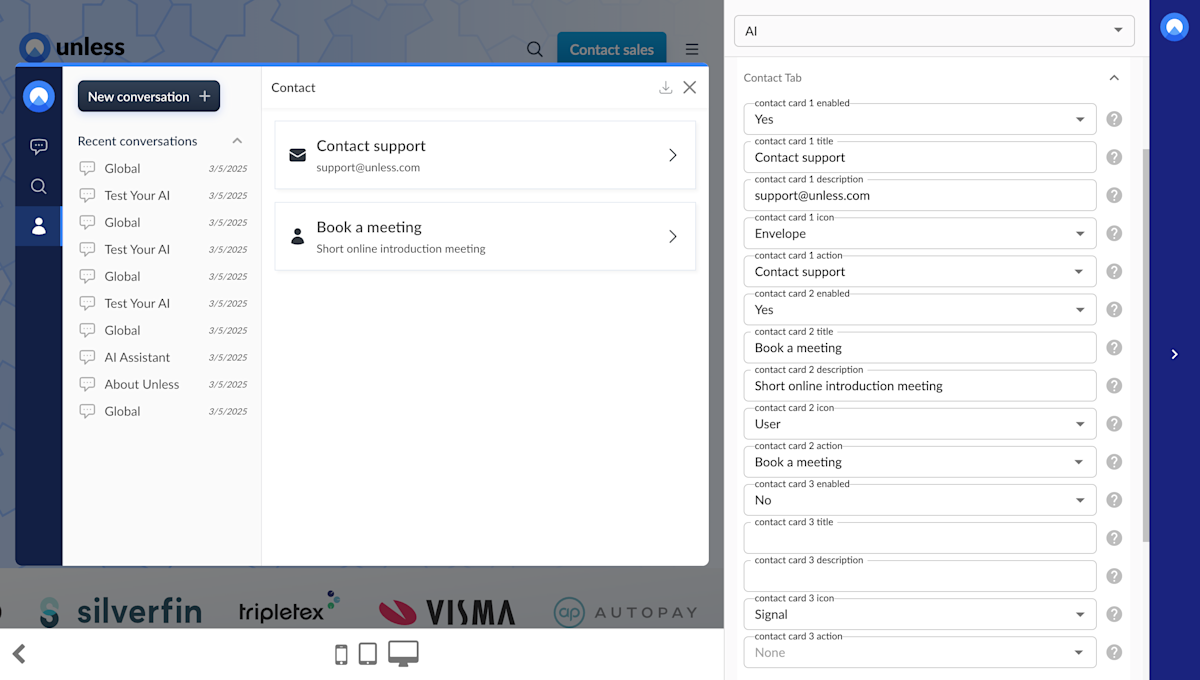
In the screenshot above, you see an example where we've opted to have two contact cards with the actions to contact our support team and to book a meeting.
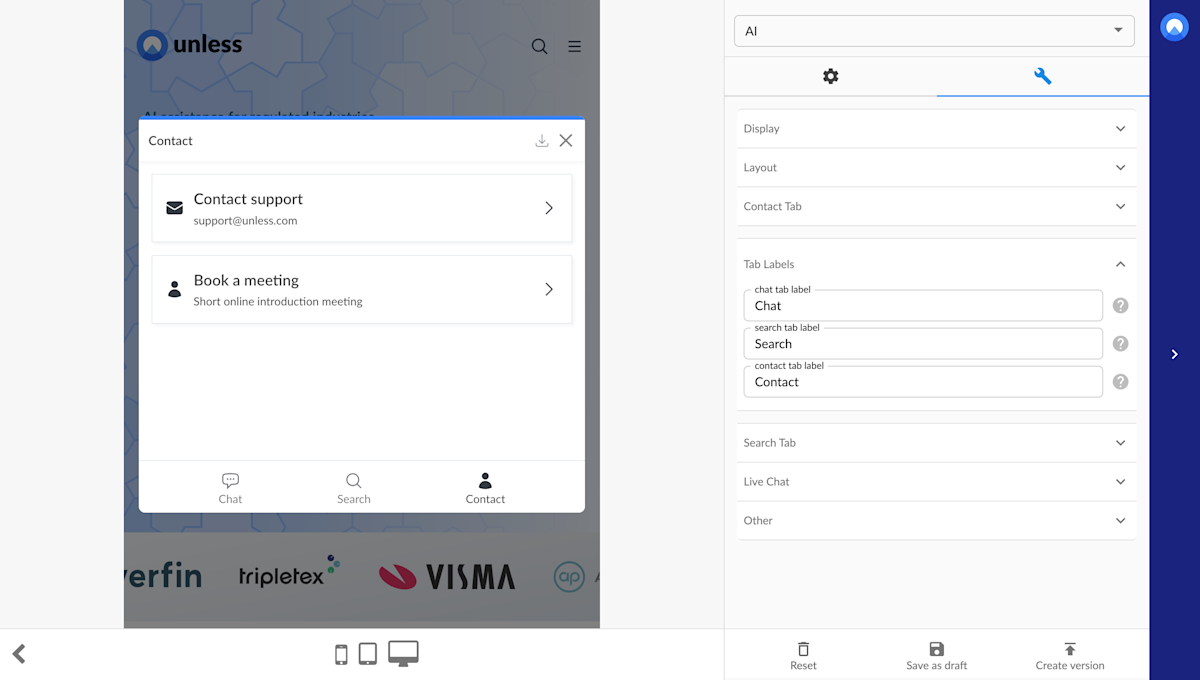
Labeling the tabs
Then we have the Tab labels tab where the options are pretty straightforward. Here you can define what the text should be for each of your tabs: chat, search and contact (optional).
Make sure you save your changes and create version and publish!
Note: The AI will not automatically be visible to end users so you can make all the changes you need on your own time to prepare before launch. When you are ready to go live, you can add an AI starter button or any other conversational UI component.


