Agent

One agent. Every customer moment.

The customer-facing side of Unless — one AI Customer Agent across acquisition, retention, expansion, and support, with the Help Center it auto-generates as its public face. Browse a moment, or see the full overview.

Acquisition

Qualify, convert, educate. 24/7 on your marketing site.

Retention

See churn coming. Act before it does, inside the customer's product.

Expansion

Catch upsell signals early. Route them to the right owner.

Support

Resolve, co-pilot, learn — across every helpdesk and channel.

Engine

The platform underneath.

The back-of-house side of Unless — a Living Knowledge library that maintains itself, plus the Train → Test → Deploy → Analyze loop that keeps every Customer Agent sharper after every conversation. See how the engine compounds.

Train

Always current. Always ready. Living Knowledge + Living Context.

Test

Before a customer sees it. Preview, simulate, audit.

Deploy

One agent. The whole journey. Memory across all of it.

Analyze

Performance, value, AI maturity. All visible. All live.

Trust

Built for the EU from day one

The architecture that lets your DPO, security, and procurement teams sign off without slowing your team down. Browse the page, or jump straight to a section.

Privacy Vault

Twelve numbered measures keep sensitive identifiers home.

Compliance posture

Three pillars — sovereignty, AI Act readiness, sector readiness.

Architecture

Five EU-resident layers — touchpoints to LLM constellation.

Frameworks

EU AI Act, GDPR, DORA, OWASP — built into the platform, not bolted on.

Customers

Trusted by leaders

How regulated-Europe brands — from Visma to Onguard — turned customer success into a revenue engine with Unless.

Visma Enterprise AS

Norway's leading ERP — modernized self-service with Unless.

Helping patients

Patient self-service surged within weeks of deploying Unless.

Enhancing credit software

Financial service Onguard powers their support operations with Unless.

Ticket deflection at scale

Meet Sally, Kontek’s AI support colleague in regulated finance.

Resources

Search resources and support articles

Documentation, articles, and recipes for getting the most out of your Unless deployment — plus a help desk when you need a human.

Help center

Get-started guides and advanced playbooks for the platform.

Security and compliance

Privacy measures, security by design, and compliance guidelines.

Developer documentation

Find reference documentation for the javascript API.

The Unless cookbook

Bite-sized examples for every stage of the customer lifecycle.

Pricing

Pay per outcome. You choose.

Two equal-weight plans, both built around outcomes. Browse the page, or jump straight to a section.

The two plans

Flex (€0.99 per outcome) or Fixed (€1,999/month). Equal weight.

What's included

Full platform on both — Living Knowledge, Memory, Context.

Flex modules

Productized add-ons. À la carte on Flex, bundled into Fixed.

Frequently asked

What counts as an outcome, fair use, and switching mid-year.

Article

How to set up a form embed component

Find out how you can set up an embeddable form component with Unless.

Updated 18 February 2025

Most Unless component templates consist of a combination of text, images or videos, a CTA button or two, and an email field. Custom components with additional fields can also be built by Unless or your developers.

However, if you would like to conduct more extensive surveys, collect feedback, or check on your Net Promoter Score (NPS) using a third party service like Typeform, that is also possible.

You can then easily show these forms in your product or website with our embeddable form components. And with Unless' additional functionalities you can specify who you want to show the forms to, where you want them placed, when they should get triggered, etc.

How to set up a form embed component

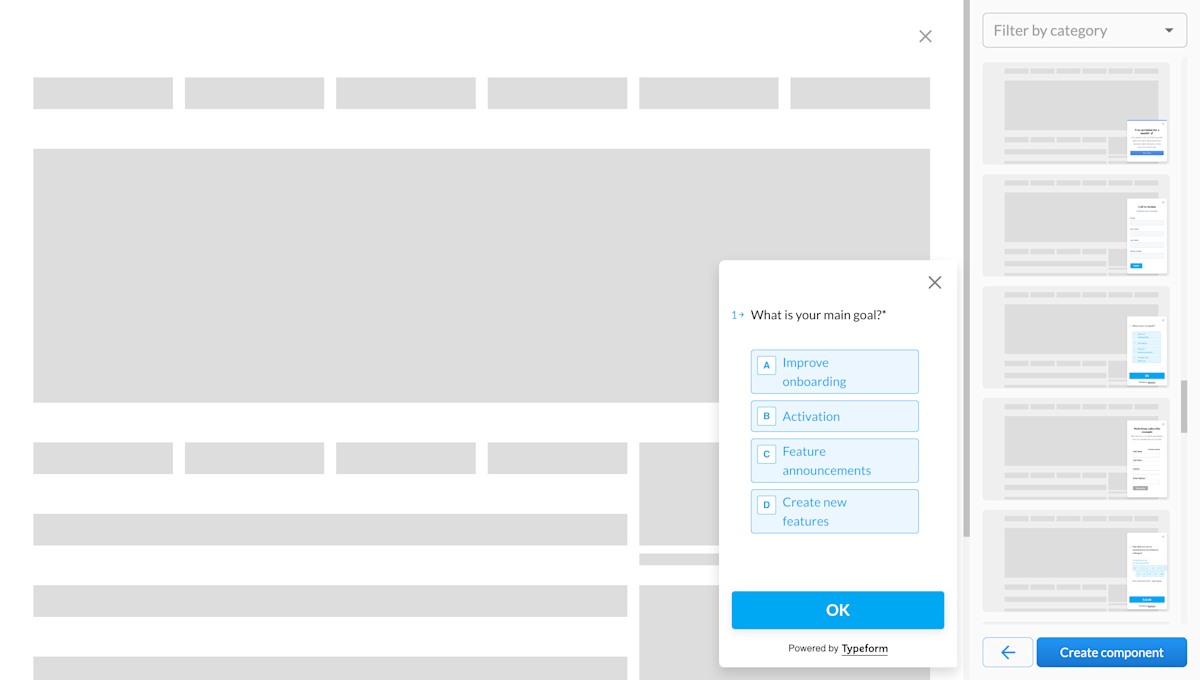
First step as always is to choose a component template. Via the Components tab, you can view the complete library of components that are ready out of the box. Most form components fall under pop-ups and side-boxes.

Form embed component templates

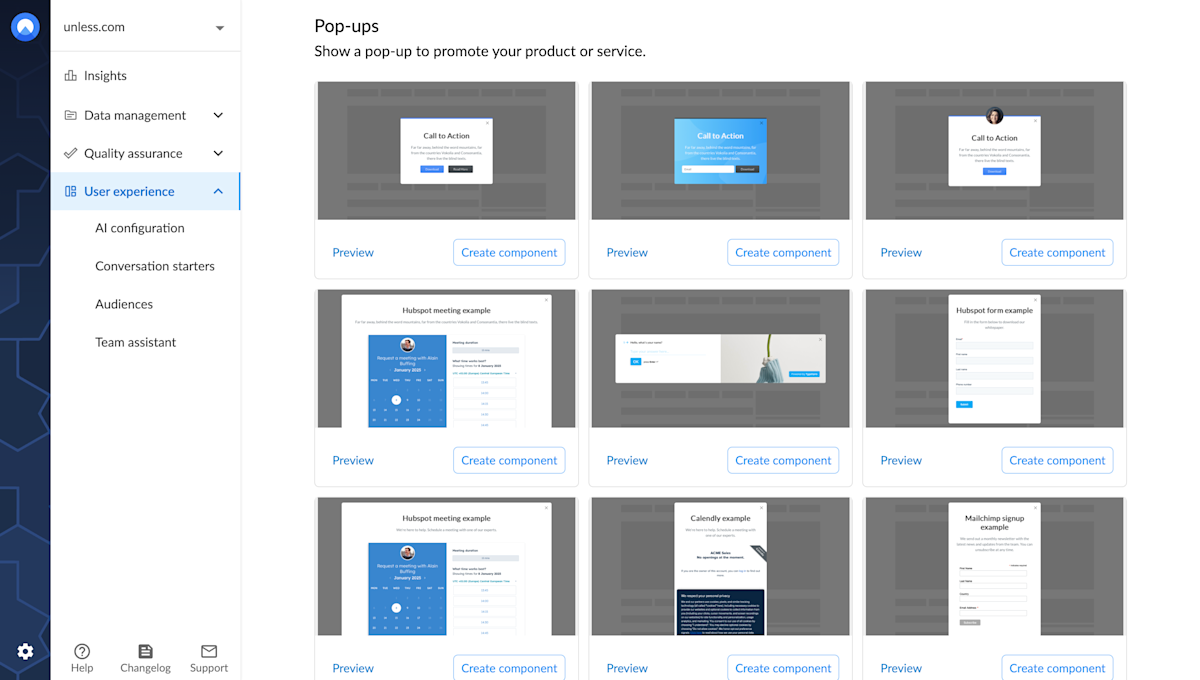
You can preview the different components before choosing the one you want to use. You will notice a combination of native Unless components as well as embeddable form components that work with Calendly, Hubspot, Mailchimp, and Typeform. Once you've made your choice, click Create component to get started.

Form embed component preview

Note: If you would like to use a form from a different third party service, let us know!

Component settings

This will take you to the Settings tab. You might notice that the settings for a component are very similar to on-site experiences. You give your component a name, define the page(s) it should appear on as well as the audience(s) that should see it.

Form components can be inline or overlays. For overlays there are some additional settings available like when the component should appear so that is good to keep in mind.

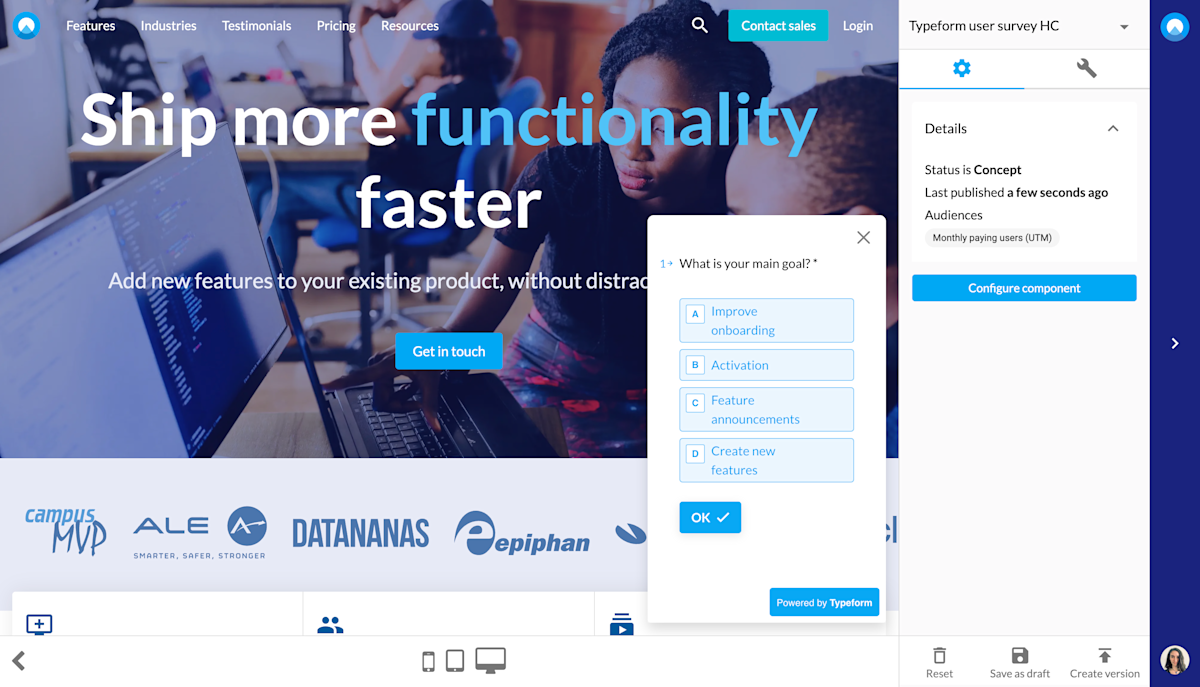
After adjusting the settings, first click Save and then click Open editor. Once you are in the editor, as in the example below, you can click Configure component.

Configure the form component in the editor

Overlay component design

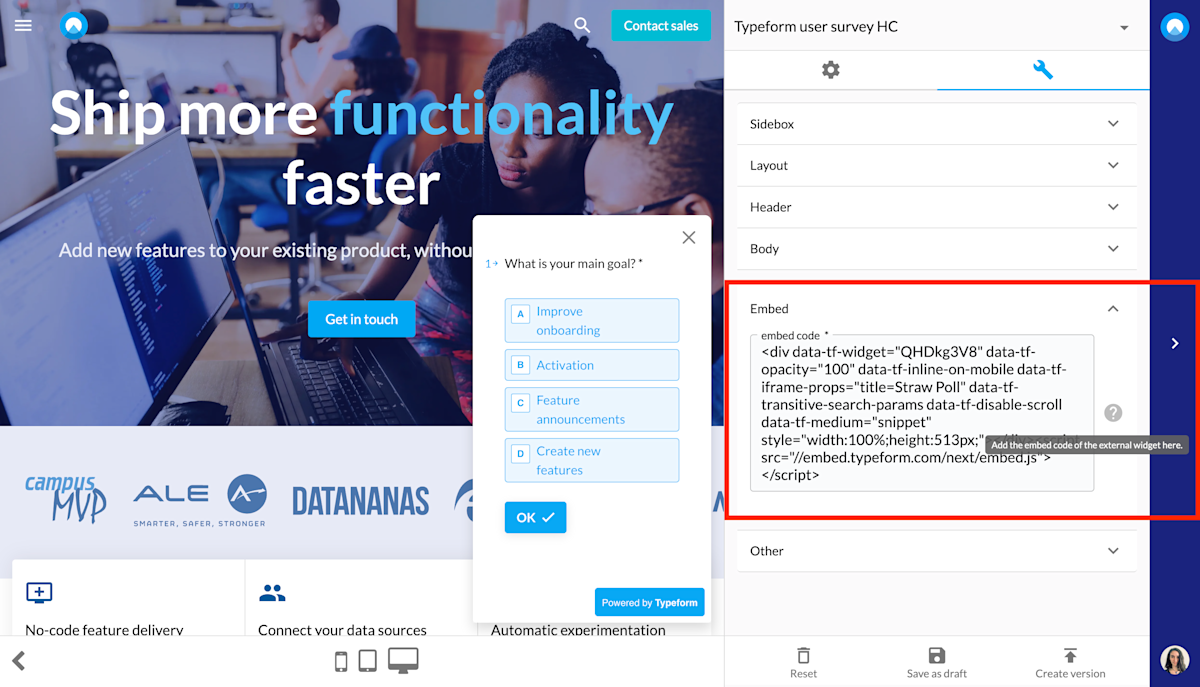
First thing to do with any form embed component is to get the embed code and paste it in the Embed field within the Unless editor. Below is a screenshot of what that looks like.

Most services like Typeform and Calendly have help center articles that explain how you can find this code in their product. And don't worry if you're not a developer, all you have to do is simply copy and paste. Your form will then appear in the editor, within an Unless component.

Embed field within the Unless component editor

Generally, Unless components are very versatile. You can use your brand themes and the various options within the editor to adjust your content and designs.

If you would like to add a header and body section to provide context for your form, that is possible here. However in the case of embeddable form components, the design is coming from the third party service. So any changes you'd like to make (like color changes, adding an extra question, etc.) will have to be done via their product.

Once you've made all the changes you need and your component is ready, make sure to save, create new version and publish before exiting the editor. Then click start experience at the Settings tab for this component which we've seen earlier.

Ps. Did you know you can link multiple experiences to each other? For example, you can have a bar component that asks your users if they'd like to take part in your latest survey with two CTA buttons for Yes and No. If the user clicks No, the component is closed. If however they click yes, they can then see a component with the embedded form.

Related content

We're here to help

Quick responses if you have an issue. Feel free to ask us anything — or ask our conversational AI a question.